4) identify, locate and match sounds recorded with microphones
5) touch an object
6) pick up, move, and let go of an object
a) put objects back to original container/location
7) higher level tasks
a) follow me
b) Recharge own batteries
c) change DVD-R disk to store more images and sounds
d) clean
1) kitchen floor, bathroom floor (no objects to move)
2) dishes
3) toilet, shower
e) cook
1) open packages
2) turn on/off oven/stove
3) cut vegtables
f) shop for food objects
g) (possible) drive
possible future:
1) fire/heat sensors and alarms
2) capture a human
3) lights for night/dark
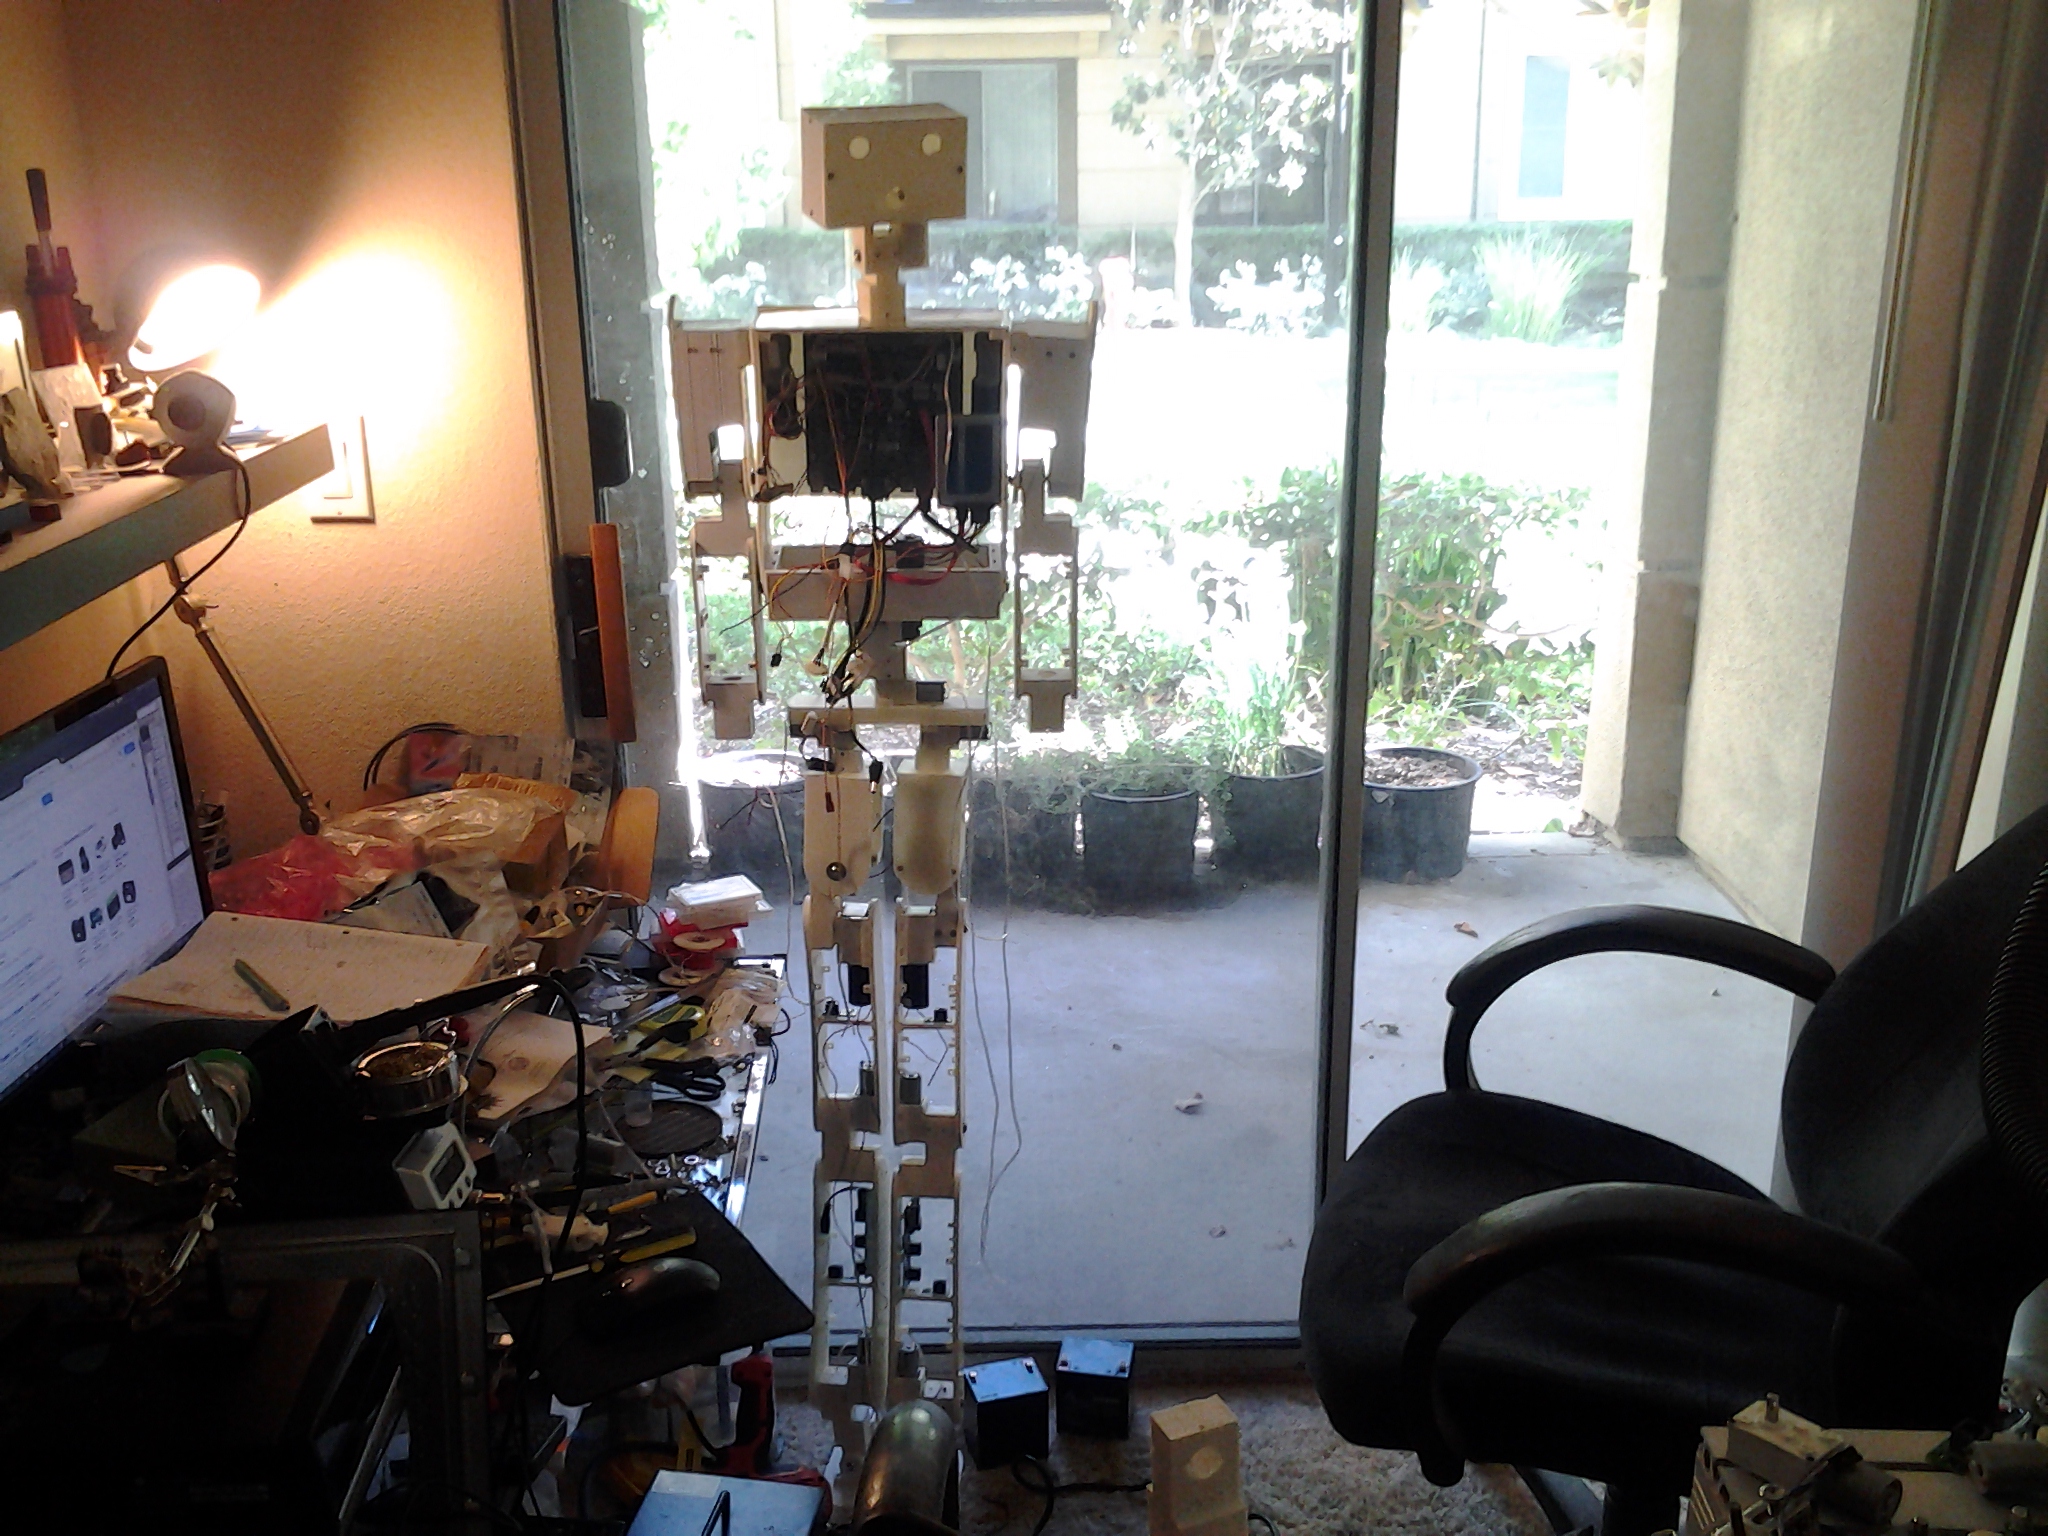
I am building a walking robot made of aluminum welded using
GTAW (TIG). I am using RTAI (real time linux) to communicate with a PIC16F84A
thru a laptop serial port at 115,200 bps. The PIC sends address and
data lines to turn car window DC gear motors and to get input from
AXDL202 accelerometer chips. The robot uses two USB cameras,
although I have not started to recognize objects, or measure depth
and size of objects yet. At this time I have a kernel module that
sends and gets PIC commands, and a user app program that gets
images from the USB port and uses a fifo to send key presses to the
kernel module. Eventually I would like to get the keyboard and
USB input in real time. I chose RTAI because RTlinux (New
Mexico) was not built for a kernel that has USB support.
Here is my aluminum robot. I want to bring this robot with me in the passenger seat of my car and capture images of people laughing when the robot turns.
Now I have my robot hanging from a crane I bought at Harbor Freight Tools. This is the best way to test balancing and walking a two leg robot.
Here is an incomplete image of the robot circuit I have put together.
Main Robot Circuit H-Bridge Motor Circuit
***Important note: There is no need to put a fuse on the h-bridge, one fuse on the battery for the entire circuit should be enough. I get no advice, and have to learn everything myself, so I am sure there are other ways you can optimize this circuit. Please share with me if you have advice on how to make the irfz48n and irf4905 not get damaged and melt.
and some notes on the circuit. Robot notes
I want to encourage the building of robots, and share the collective information of the human species. In this era of free flow of images and sounds, let the most honest, smart, and helpful be recognized and supported.
Let humans play, learn, grow and move together in building walking robots, going to other planets, and in any activities humans want to. Not everybody has to share, but my support for those that do.
Here is the .asm source code for full duplex 115200 bits/second asyncronous communications with a serial port for a PIC16F84A and 20MHz clock:
I spent months on this code, not one instruction is wasted! What is amazing to me is that the PIC clock is one time every 200 nanoseconds 200e-9 s! and so each instruction is 200 ns. Is that fast or what? 115200 bps = 8us (micro seconds 8e-6!)
Update: There may be a way to improve this code, using the technique I use in the "115200z.asm" code. The basic idea is using 8.8us for 115200 bps (8.681us) while getting each bit in a byte, but then for the stop bit only going 8.6us, I am not sure if this will cause problems with the send byte. The main idea that I thought of is ending early in the stop bit because any check for a start bit will not matter then because the stop bit is 1 (5v or -12v) and there will be time to wait for the 0v start bit of the next byte. The main thing is that the main loop should be near 8.681us. 115200.asm
also for 57600: 57600.asm
I tested these with real time Linux (RTAI), there was a time when the code was ok with "minicom", but the RTAI has more accurate timing and showed errors for bytes sent one after the other. One thing I thought of is that an echo program could also be used if all that is wanted is an echo. Get PORTA,0 and set PORTA,1 then what ever is got is also sent and no matter what speed.
This code is free to use and copy!
Here is my code for my robot that uses 2 byte commands, I got this going without any errors!
115200z.asm
Here is my code for the robot that uses 2 byte instructions (8 bit address, 8 bits of data)
pic0.asm is for the top PIC that communicates with the serial port, and sends/gets 8 bits of data pic0.asm
pic1.asm is the bottom PIC that gets a 1 byte instruction and simply puts this byte on to the 8 bits of PORTB as 2 sets of 4-bit address lines. pic1.asm
This is the PIC16f84A code I am using to read in 2 axes from an ADXL202 and output 5 and 6 bit output readings.
This code can be used in any project (as can any thing I do) to measure tilt in 2 dimensions. With a PIC16f84a there are only 5 bits on PORTA and 8 bits on PORTB, so that is why 2=bits for input, 6+5=11 bits for outputs. You could read in one adxl line and output up to 12 bits of output reading. picadxl.asm
This code is open source, public domain and can not be copyrighted robot.c (robot [Linux OS] program)
This code is open source, public domain and can not be copyrighted robotkm.c (robot [RTAI] kernel module)
ROBOT WITH WHEELS
I call this robot "Follower" since the robot will follow green lights or an orange colored cloth.
Here is me GMAW (MIG) welding a part for a steel robot I made at Orange Coast Community College.